
How to Pose for Beach Pictures: 12 Flattering Poses

Updated: 2 days ago
Table of Contents
Master the Basics of Beach Picture Posing
Flattering Beach Poses for Solo Travelers
Posing Couples for Romantic Beach Pictures
Natural Family Beach Portrait Ideas
Posing with Props: Chairs, Shells, and Towels
Choosing the Best Outfits for Beach Photography
Candid Beach Photography Tips for Authentic Shots
Your Beach Portrait Session Planning Checklist
A Final Word from Our Studio
Frequently Asked Questions
Last Updated: September 8, 2026
Master the Basics of Beach Picture Posing
Learning how to pose for beach pictures starts with understanding that the ocean, sky, and sand are your backdrop, not your competition. The most flattering beach pictures share a few technical foundations: good posture, soft natural light, and intentional body angles. At Coastal Heirloom Studio, we provide editorial direction for vacationers in Panama City, 30A, and Destin, and we find that the biggest shift happens when someone stops freezing for the camera and starts moving with purpose.
The core principle is to elongate your frame. Roll your shoulders back, drop them away from your ears, and imagine a string pulling the crown of your head toward the sky. Angle your body at roughly 45 degrees to the lens rather than squaring off, then place your weight on your back foot. This creates a natural S-curve in your silhouette, which reads as relaxed and elegant in any beach pictures. Keep your chin slightly forward and down to define the jawline, and let your arms hover an inch away from your torso.
Pro Tip Practice your "soft smile" before the session. Think of a memory that genuinely makes you laugh, then let the smile fade by half. That lingering expression photographs far more naturally than a forced grin.
Flattering Beach Poses for Solo Travelers
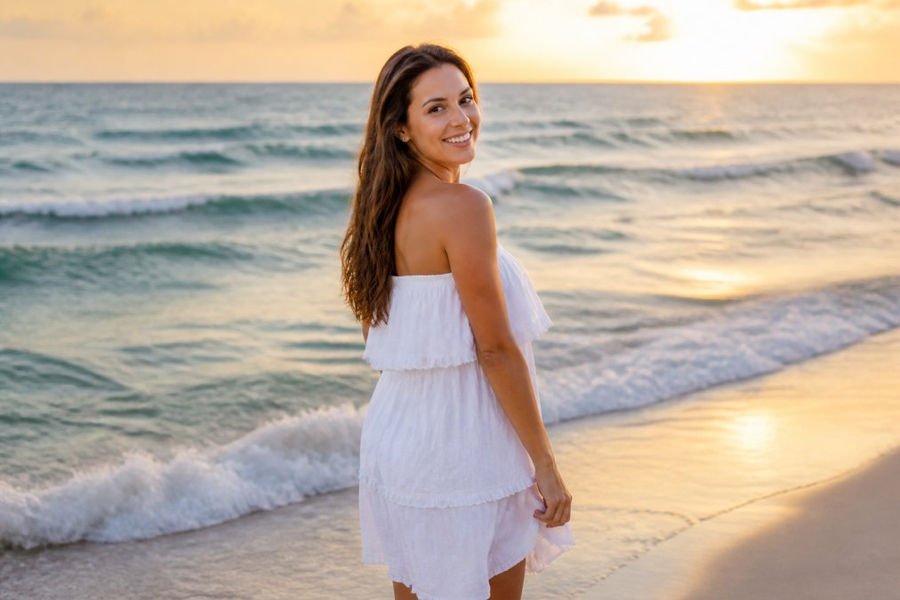
For solo travelers, the goal is to look confident and at ease, not stranded. Start with the classic "walking away" pose: stroll parallel to the shoreline while looking back over your shoulder toward the camera. Keep your hands relaxed, one brushing your thigh, the other reaching back toward your hair or hip.
The "water's edge" pose works beautifully during golden hour. Stand with your feet hip-width apart in the shallow surf, let the water wash over your ankles, and look slightly past the camera rather than directly into it. For a seated option, sit facing the ocean with your knees drawn up and arms wrapped loosely around them, your chin resting on your knees as you glance sideways at the lens.
But every one of these poses assumes someone else is holding the camera. Most solo travel guides ignore the real challenge: you are the model, the director, and the technician all at once.
Set up your tripod at knee height or lower. Most people place the camera at eye level, which flattens the body and adds visual weight. Position the tripod so the lens sits between your knee and hip height to elongate your legs. Use a phone tripod with a Bluetooth remote, or a camera tripod with a 2-second self-timer delay.
Mark your standing spot with a shell or a small stick. Frame the shot, walk to your mark, and test the composition with one test shot. Adjust the tripod until the horizon line sits at your chest or lower in the frame, never cutting through your neck.
Use the 10-second timer plus burst mode. A single self-timer shot often catches you mid-blink or with a stiff expression. Set your camera to a 10-second delay and burst mode (or use an intervalometer that fires 5-10 frames continuously). Walk into the pose, hold it for a beat, then relax.
For phone shooters, use voice activation or a palm trigger. Most modern phones let you say "Cheese" or "Capture" to fire the shutter hands-free. Alternatively, hold the phone in one hand, extend your arm, and use the volume button as a remote, this works for a casual selfie-style shot without a tripod.
Adapt poses for limited mobility. Not every solo traveler can crouch in the sand or sit cross-legged. If kneeling or sitting is difficult, the "leaning walk" works well: stand with your feet shoulder-width apart, place one hand on your hip, and lean your upper body slightly back toward the ocean. For a seated option that is easier on the knees, use a low beach chair facing the water, with your legs extended forward and ankles crossed.
Use a sandbag or weighted bag for windy conditions. A lightweight tripod will vibrate in ocean breezes, blurring your shots. Hang your camera bag or a water bottle from the tripod's center hook to add stability. If you do not have a hook, place a small sandbag over the tripod's feet.
Pro Tip For solo travelers, scout your location first without the camera. Walk the beach, find a patch of dry sand above the tide line, and note where the sun will be at your planned shoot time. This prevents you from scrambling with your tripod as the tide comes in.
Watch Out Do not leave your phone or camera unattended on the sand while you walk into frame. Waves, curious dogs, and shifting sand can knock it over. Set up on a dry, flat area at least 10 feet from the water's edge, and keep your remote or timer in your hand.
Posing Couples for Romantic Beach Pictures
Couples often make the mistake of staring at each other with stiff, symmetrical poses. The most romantic beach pictures come from genuine interaction and a little space between bodies. Stand close but not fused, with one partner angled slightly behind the other, turning their torso back toward their partner to create depth.
The "forehead touch" is a timeless option. Face each other, place your hands on each other's waists or shoulders, and gently rest your foreheads together. For a more dynamic shot, try the "lift and laugh": have one partner spin the other once, then catch them mid-laugh. Avoid the cliché nose-to-nose pose, which often looks awkward and staged.
Natural Family Beach Portrait Ideas
Multi-generational family sessions require poses that accommodate everyone, from toddlers to grandparents. The "walking together" pose is universally flattering: have the family stroll hand-in-hand along the waterline. Position the tallest members in the center or slightly back, with children and shorter adults toward the front edges, creating a gentle V-shape that frames the group.
For a seated configuration, arrange the family in a loose semicircle on the sand, with grandparents seated in low chairs and younger members kneeling or sitting cross-legged in front. Encourage everyone to interact naturally, whispering to a child or resting a hand on a partner's shoulder. The best family beach pictures feel like a candid snapshot of a reunion, not a formal lineup.
Posing with Props: Chairs, Shells, and Towels
Props add structure and give your hands a purpose, which instantly reduces awkwardness. A classic wooden beach chair is a versatile tool: sit sideways in it with your knees together and angled toward the camera, or stand behind it and lean your forearms along the top rail.
Shells are perfect for close-up, detail-oriented shots. Crouch down and examine a shell held in your open palm, or have a partner place one in your hair. A beach towel offers the most casual option: spread it flat, lie on your stomach with your chin propped on your hands, and kick one foot up behind you.
Choosing the Best Outfits for Beach Photography
The best outfits for beach photography prioritize movement, contrast, and texture over pattern. Solid, muted tones like sand, blush, sage, and soft white photograph beautifully against the blue-gray palette of the Gulf. Flowy fabrics, such as linen shirts, maxi dresses, and wide-leg pants, catch the breeze and add a dynamic element to your beach pictures that stiff cotton cannot replicate.
Avoid large logos, busy prints, and stark black, which can pull focus or appear as a harsh block in bright sand. For families, coordinate colors rather than matching exactly, choosing two or three complementary shades across the group. Consider the styling of your entire frame, including hair and accessories. A wide-brimmed hat offers both sun protection and a flattering shadow, while delicate jewelry adds a touch of polish without competing with the landscape.
Candid Beach Photography Tips for Authentic Shots
Candid beach photography tips often contradict what people expect: the best candid shots are usually directed. Rather than asking someone to "act natural," give them a simple action to perform, then let the moment unfold. Walk toward the water, toss a shell back into the surf, or chase a wave as it recedes.
For authentic beach pictures, forget the camera is there. Focus on the sensation of the sand, the sound of the waves, and the company you are with. A common mistake is to overthink the hands; let them hold a drink, adjust a hat, or brush hair from your face. Mid-motion frames often become the most treasured images because they preserve the energy of the day.
But candid framing only works if your camera settings survive the beach's unique light. Most guides stop at "golden hour," leaving you stranded if your session falls at 10:00 AM or under a bright overcast sky.
Master the exposure triangle for sand and surf. Sand is a natural reflector, bouncing light upward into shadows and fooling your camera's meter into underexposing your subject's face. In manual mode, start with a shutter speed of at least 1/500s to freeze wind-blown hair and receding waves (photographyblog.com). Set your aperture between f/2.8 and f/4 for a single subject to blur distracting background swimmers. Then adjust your ISO last, starting at 100 and raising it only if the image is too dark.
Use exposure compensation as your safety net. If you are shooting in aperture priority, dial in +0.7 to +1.0 stops of exposure compensation. This forces the camera to brighten the image, keeping skin tones warm rather than muddy gray. On most phones, tap the subject's face on the screen, then drag the sun icon upward slightly to achieve the same effect.
Fix white balance before you shoot, not after. Auto white balance on the beach often produces a cool, blue cast that makes skin look pale. Switch your camera's white balance to "Cloudy" (approximately 6000K) to add warmth, or set a custom white balance using a gray card. For phone shooters, the "Warm" or "Vivid" filter presets can approximate this.
Shoot in burst mode for genuine laughter. Candid moments, a child's squeal, a couple's spontaneous hug, last fractions of a second. Hold the shutter button down for a 2-3 second burst and select the sharpest frame later. This is especially effective when you have directed an action, like "spin her once," because the genuine reaction peaks right after the instruction ends.
Pro Tip For candid shots on bright sand, use a circular polarizing filter on a DSLR or mirrorless lens. It cuts glare off the water and wet sand, deepens the blue of the sky, and reduces the harsh highlights that cause squinting. Rotate it until the glare disappears in your viewfinder before you start shooting.
Watch Out Do not rely on your camera's auto-exposure when the sun is directly behind your subject. Backlit scenes will turn faces into dark silhouettes. Instead, meter off the sand at your subject's feet, lock that exposure, then recompose for the shot. Alternatively, use fill flash or a reflector to lift the face without blowing out the background.
Your Beach Portrait Session Planning Checklist
A successful beach portrait session depends on preparation long before you step onto the sand. This checklist covers the essentials for a smooth, stress-free experience.
Choose the right time: Schedule for the hour after sunrise or the hour before sunset for the best natural light.
Coordinate your wardrobe: Select 2-3 complementary colors and try on outfits to confirm they fit and move well.
Bring a backup outfit: Sand, salt spray, and toddler snacks happen. A second look saves the session.
Pack the essentials: Water, a lint roller, oil-blotting papers, and a brush for quick touch-ups between shots.
Communicate with your photographer: Share your family's dynamics, any mobility concerns, and the look you want to achieve.
Trust your posing guide: Let the photographer direct you into poses that flatter your specific body language and comfort level.
The technical side matters, too. For those shooting their own beach pictures, remember that aperture priority mode with a wide aperture (around f/2.8 to f/4) creates a beautiful depth of field, blurring the background while keeping your subject sharp. Adjust your white balance to "cloudy" to warm up the natural tones, and keep your shutter speed fast enough to freeze the motion of wind-blown hair and waves. According to general guidance on beach photography lighting, metering off the sand can trick your camera, so consider using exposure compensation to keep skin tones accurate in bright conditions.
A Final Word from Our Studio
Feeling confident in front of the camera is a skill, and like any skill, it improves with practice and the right guidance. The difference between a stiff snapshot and a heirloom-quality portrait often comes down to a photographer who knows how to direct light, movement, and emotion. As noted in professional posing resources, the most important element is always the connection between the photographer and the subject.
At Coastal Heirloom Studio, we believe beach pictures should feel like the vacation itself: warm, unhurried, and full of genuine joy. With over 40 years of photography experience and a calm, guided approach, we handle the technical details of light and posing so you can simply be present with the people you love. Our fine-art editing ensures natural skin tones and coastal colors that will look as beautiful in twenty years as they do today.
Most people do not dislike how they look in photos; they dislike how they feel during the session. The fix is a posing approach built on comfort and authentic interaction, which is exactly what we design for every family, couple, and graduate we photograph. Coastal Heirloom Studio offers private, one-family-at-a-time sessions with full editorial direction, from wardrobe and posing through to hand-edited, high-resolution files. We would be honored to help you preserve your coastal memories. Get started with Coastal Heirloom Studio and book your session today
Frequently Asked Questions
How can I avoid looking stiff in beach pictures?
Movement is your best tool. Instead of holding a pose, walk along the shoreline, let the wind move your hair, or shift your weight from one foot to the other. Ask your photographer to shoot in burst mode while you move naturally. Focus on your breathing and think of a memory that makes you smile. Genuine emotion reads better than a forced grin.
What should I wear for a professional beach portrait session?
Choose fabrics that move, like linen, chiffon, or lightweight cotton. Solid colors and earth tones photograph well against sand and water. Avoid large logos and busy patterns that distract from your face. For beach portrait session planning, bring a backup outfit in case of wind or splashes.
What camera settings are best for beach photos?
Shoot in aperture priority mode with a wide aperture (f/2.8 to f/4) to blur the background. Set your ISO low (100-200) and use a fast shutter speed of at least 1/500 to freeze movement. Bump your exposure compensation up by one stop to keep sand bright.
Book a Session


Comments